


- Joined
- Jun 13, 2020
- Messages
- 8,051
- Reaction score
- 1,023
- Points
- 212
- Awards
- 2
In general I am a big fan of Kali Linux which also includes a fair share of digital forensic tools. But since I want to learn about some specific digital forensic techniques I decided to go for a Linux distribution focused on forensics only and write a small tutorial about it. I also prefer to use virtual machines instead of live CD’s as they’re easier to manage and maintain. In this tutorial we are going to install Caine 8.0 on a virtual machine and run it from the virtual disc instead of a live CD. The live CD contains a tool called SystemBack which we will be using to install Caine on the VM’s virtual hard drive.
Caine 8.0 installation
In the tutorial we will be using VMware Workstation 12 player on Windows to host the guest system. VMware Workstation 12 player can be downloaded from the VMware website for free. Of course you can use any virtualization software you like as the Caine 8.0 installation process is software independent.
First we need to download the Caine 8.0 iso from the following website:
http://www.caine-live.net
Setting up the Caine 8 VM
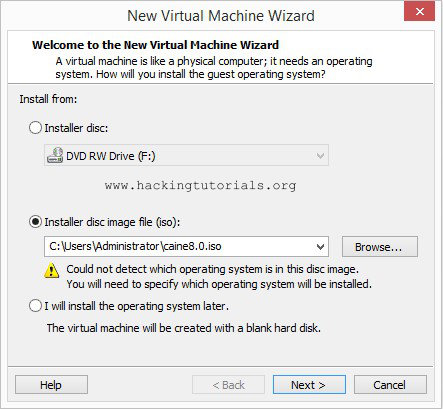
Now that we have downloaded the iso file we need to create a virtual machine and boot it from the live CD. Let’s create a new virtual machine and specify the Caine 8.0 iso as installer disc:
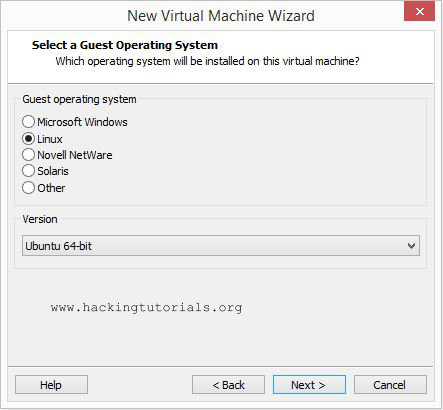
In the next screen select Linux as guest operating system and choose for Ubuntu 64-bit as the version:
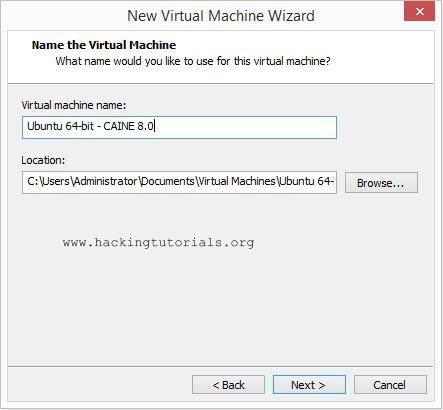
Name the virtual machine and specify the location to store the VM:
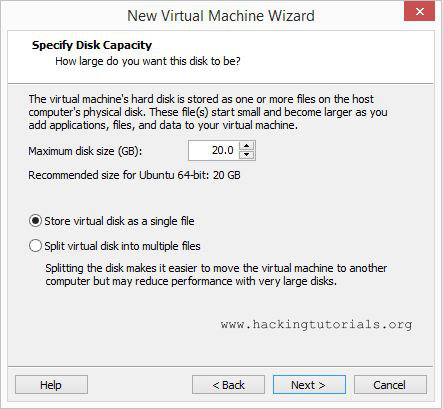
Store the virtual disk as a single file and use the recommended disc size:
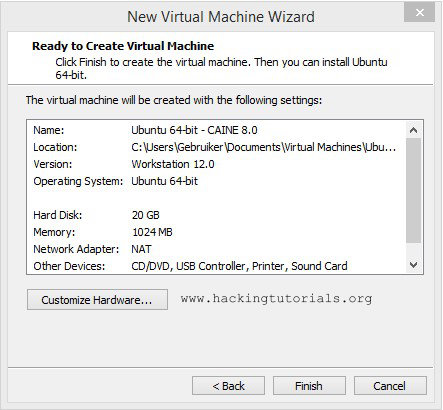
Keep the default hardware settings (or give the VM a little more memory) and press finish:
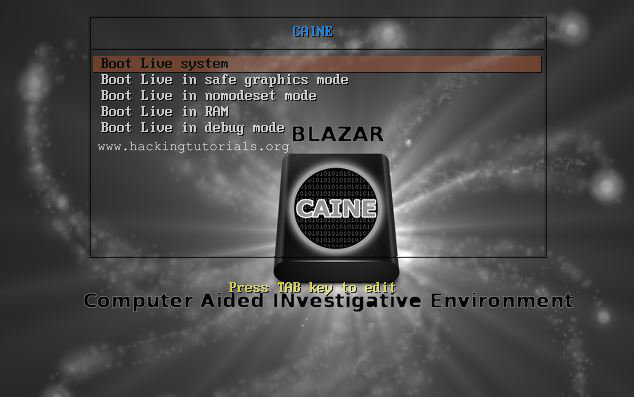
Now boot the virtual machine and choose ‘Boot Live system’ in the start-up menu:
Caine 8.0 will now boot from the Live CD, be patience as this may take a little while. After the live CD is booted you will be presented the Caine 8.0 desktop. If you’re presented with a command line than type ‘startx’ to start a desktop session.
Caine 8.0 boots with a default resolution of 800×600 which is a little small to work effectively. You can change the screen resolution by going to menu > System > Preferences > Hardware > Displays:
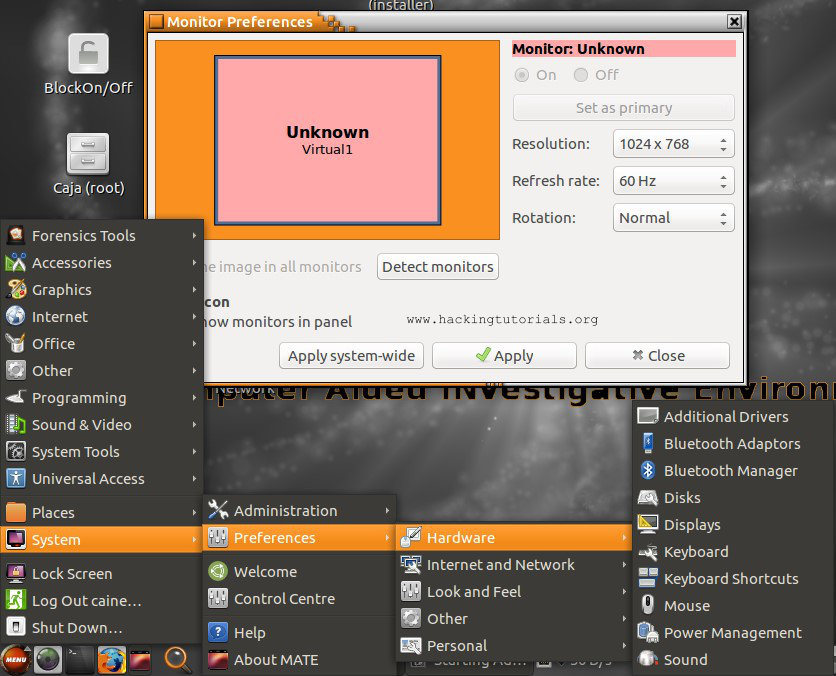
1024×768 or higher is a nice resolution to work with.
Unlocking the virtual disc
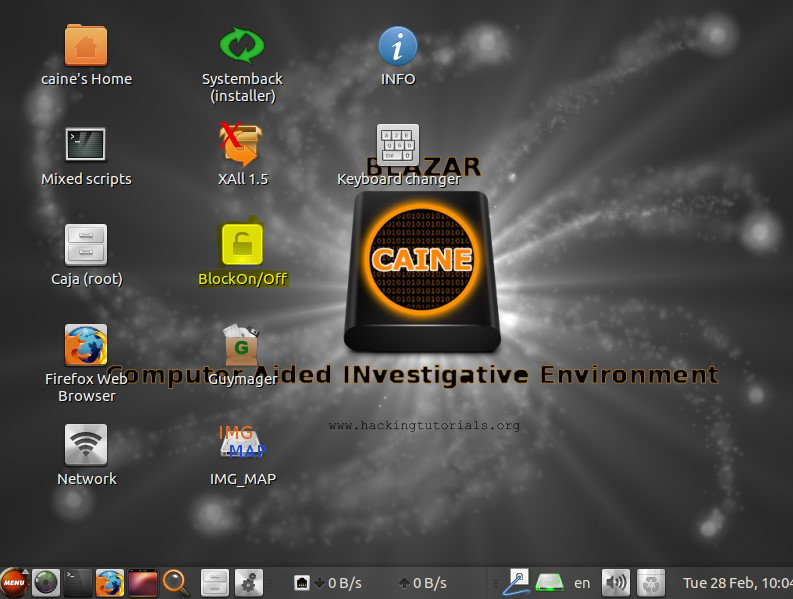
The next step in this tutorial is to install Caine on the virtual disc. We will use the SystemBack tool for this purpose which is located on the desktop. Before we can install Caine on the virtual drive we need to unlock it first with a tool on the desktop named ‘BlockOn/Off’:
Open the BlockOn/Off tool from the desktop.
Select sda1 (use the small selection box before the device name) and press the OK button:
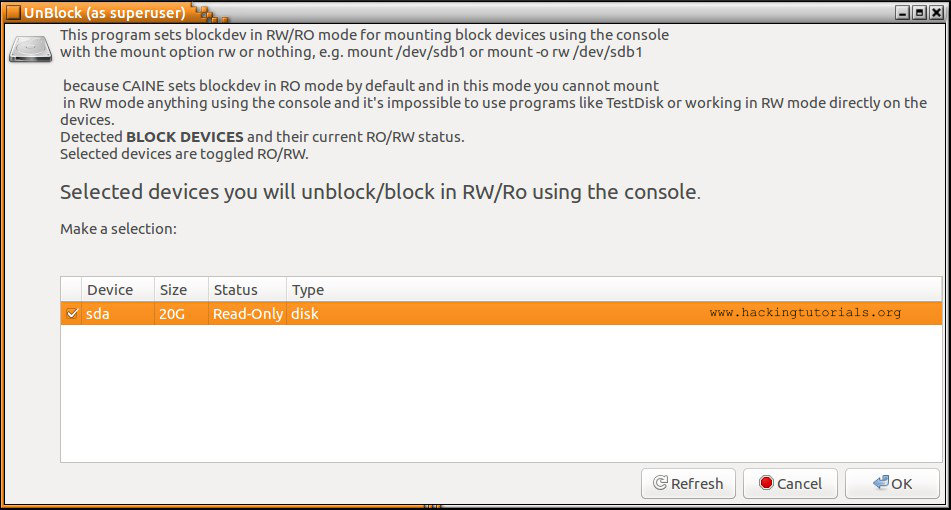
Select sda 1 and make it writable.
This will change the device status from Read-Only to Writable.
Installing Caine 8.0 with SystemBack
The next step is to start the SystemBack tool, which is located on the desktop, and choose for ‘System install’ in the menu on the right side of the following window:
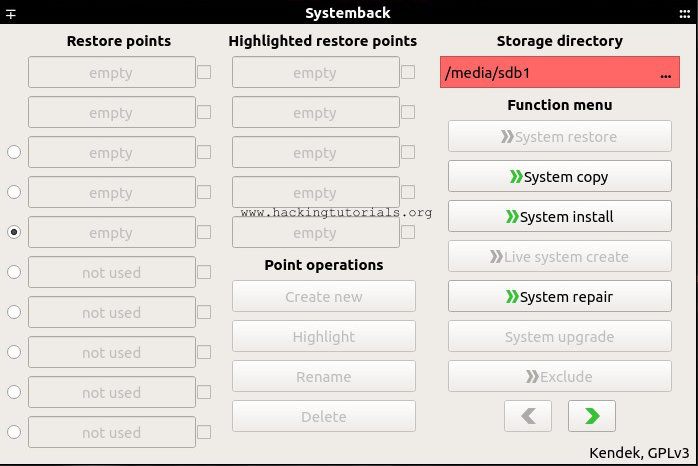
Click system install.
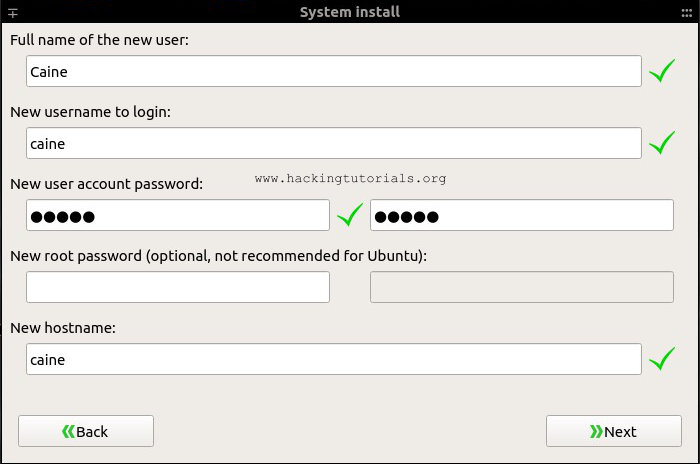
Than we need to create a new system account for the system install. Enter the requested information and press the ‘next’ button:
Setting up the Caine 8.0 partition
Now we have to create a partition to install Caine 8.0 on. Select the /dev/sda partition and press the ‘Delete’ button. We will be creating a new partition on the virtual disc in the next step:
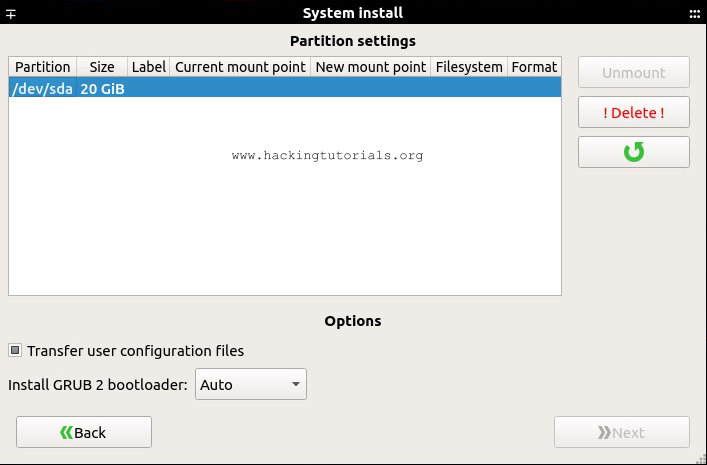
Then select the /dev/sda? Partition and press the left arrow button:

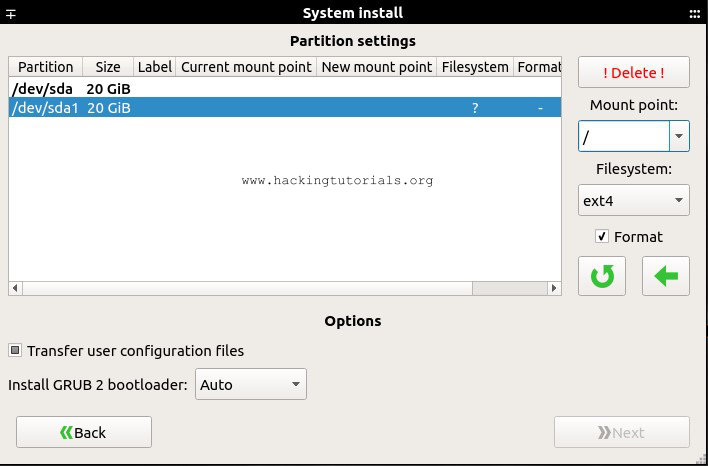
Now choose the root directory as mount point (/) and keep the default filesystem ext4. Nowadays it’s better to stick with an ext4 filesystem instead of ext3 because it supports a larger individual file size (16 TB instead of 16 GB) and overall file system size among some other benefits.
To continue the installation process press the left arrow button again to apply the settings, then click the ‘next’ button again to proceed:
Install Caine 8.0 on the virtual drive
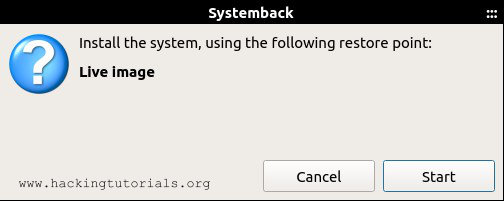
You will now be asked to install the system from the live image with the following dialog screen. Confirm by clicking the ‘start’ button:
The installation process will start now:
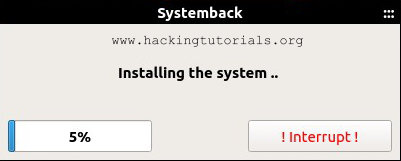
After the installation process is finished reboot the system and remove the live CD iso. You will have a clean installation of Caine 8.0 Blazar now booting from the virtual drive instead of the Live CD.
Caine 8.0 installation
In the tutorial we will be using VMware Workstation 12 player on Windows to host the guest system. VMware Workstation 12 player can be downloaded from the VMware website for free. Of course you can use any virtualization software you like as the Caine 8.0 installation process is software independent.
First we need to download the Caine 8.0 iso from the following website:
http://www.caine-live.net
Setting up the Caine 8 VM
Now that we have downloaded the iso file we need to create a virtual machine and boot it from the live CD. Let’s create a new virtual machine and specify the Caine 8.0 iso as installer disc:
In the next screen select Linux as guest operating system and choose for Ubuntu 64-bit as the version:
Name the virtual machine and specify the location to store the VM:
Store the virtual disk as a single file and use the recommended disc size:
Keep the default hardware settings (or give the VM a little more memory) and press finish:
Now boot the virtual machine and choose ‘Boot Live system’ in the start-up menu:
Caine 8.0 will now boot from the Live CD, be patience as this may take a little while. After the live CD is booted you will be presented the Caine 8.0 desktop. If you’re presented with a command line than type ‘startx’ to start a desktop session.
Caine 8.0 boots with a default resolution of 800×600 which is a little small to work effectively. You can change the screen resolution by going to menu > System > Preferences > Hardware > Displays:
1024×768 or higher is a nice resolution to work with.
Unlocking the virtual disc
The next step in this tutorial is to install Caine on the virtual disc. We will use the SystemBack tool for this purpose which is located on the desktop. Before we can install Caine on the virtual drive we need to unlock it first with a tool on the desktop named ‘BlockOn/Off’:
Open the BlockOn/Off tool from the desktop.
Select sda1 (use the small selection box before the device name) and press the OK button:
Select sda 1 and make it writable.
This will change the device status from Read-Only to Writable.
Installing Caine 8.0 with SystemBack
The next step is to start the SystemBack tool, which is located on the desktop, and choose for ‘System install’ in the menu on the right side of the following window:
Click system install.
Than we need to create a new system account for the system install. Enter the requested information and press the ‘next’ button:
Setting up the Caine 8.0 partition
Now we have to create a partition to install Caine 8.0 on. Select the /dev/sda partition and press the ‘Delete’ button. We will be creating a new partition on the virtual disc in the next step:
Then select the /dev/sda? Partition and press the left arrow button:
Now choose the root directory as mount point (/) and keep the default filesystem ext4. Nowadays it’s better to stick with an ext4 filesystem instead of ext3 because it supports a larger individual file size (16 TB instead of 16 GB) and overall file system size among some other benefits.
To continue the installation process press the left arrow button again to apply the settings, then click the ‘next’ button again to proceed:
Install Caine 8.0 on the virtual drive
You will now be asked to install the system from the live image with the following dialog screen. Confirm by clicking the ‘start’ button:
The installation process will start now:
After the installation process is finished reboot the system and remove the live CD iso. You will have a clean installation of Caine 8.0 Blazar now booting from the virtual drive instead of the Live CD.