


- Joined
- Jun 13, 2020
- Messages
- 6,993
- Reaction score
- 908
- Points
- 212
- Awards
- 2
OpenVAS installation
Let’s start with installing OpenVAS and run the following commands in a terminal session to download and install OpenVAS:
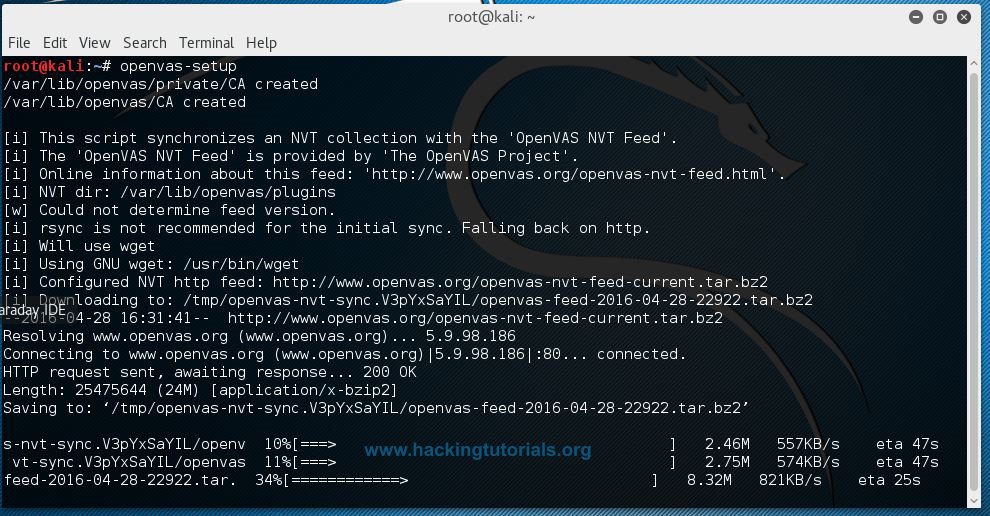 The last commands is setting up OpenVAS and is synchronizing the NVT feed with the NVT collection on your machine. Depending on your connection speed this might take a while to finish.
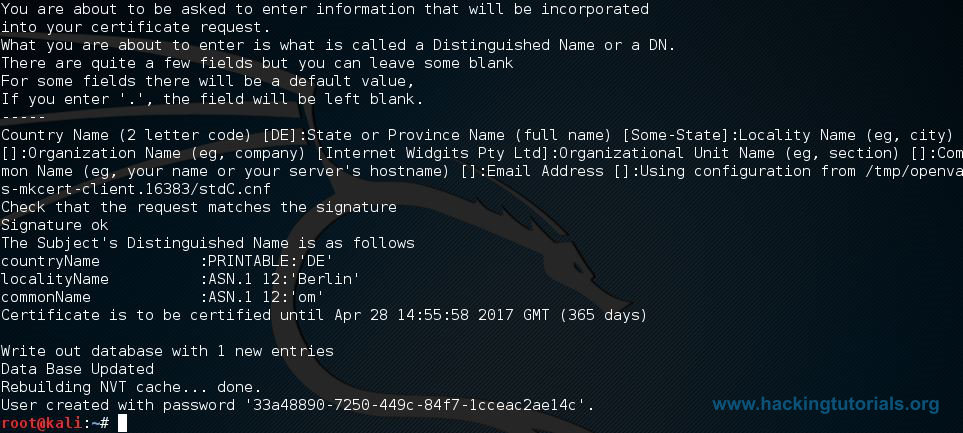
When the installation process is finished you will be presented a long password on the last line of the console. This password is used to login to the OpenVAS web interface so you need to save it somewhere and change it after the first login.
When the OpenVAS setup process is finished the OpenVAS manager, scanner and services are listening on port 9390, 9391, 9392 and on port 80. You can use the following netstat command to check if these services are listening:
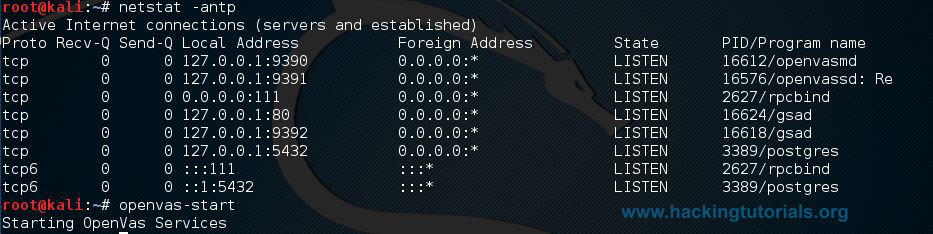
If the OpenVAS services are not running than use the following command to start these services:
Scanning Metasploitable 2 with OpenVAS
Starting a scan with OpenVAS is very easy and straightforward. Just enter the target’s hostname or IP address in the quick start field and press the ‘Start Scan’ button. Make sure you only scan targets with OpenVAS you physically own or have (written) permission to scan. OpenVAS vulnerability scanner will generate a lot of network traffic which may lead to crashes or DOS.
When the scan is finished click to the reports page under the Scan Management menu and have a look at an overview of the scan results:
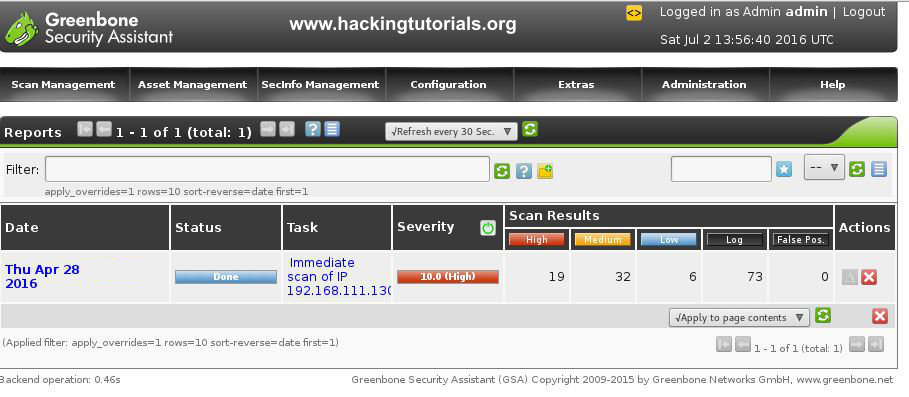
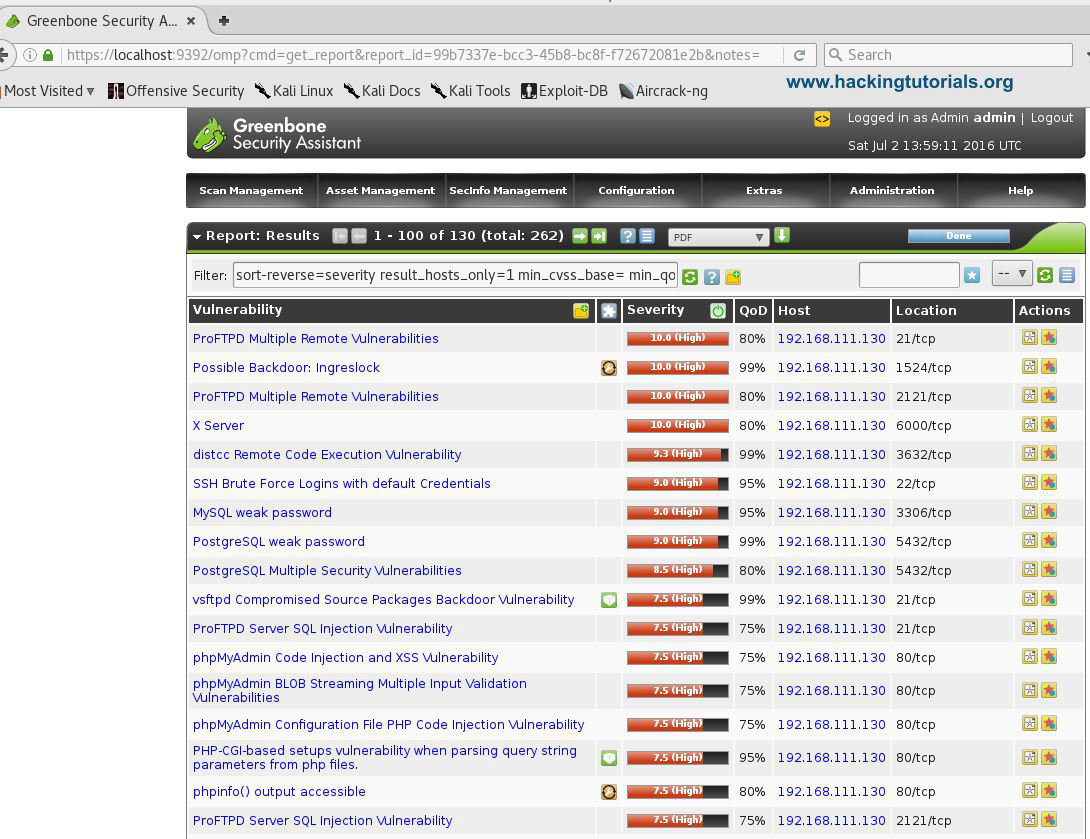
As you can see the Metasploitable 2 vulnerable machine contains 19 high, 32 medium and 6 low rated severity vulnerabilities. When you click on a report you can see a more detailed overview of the found vulnerabilities. The list of known vulnerabilities is ordered on severity:
OpenVas offers a lot more functionality, including the vulnerability database from the feed categorized in CVE’s, NVT’s and CPE’s. The SecInfo Management tool also offers a nice dashboard showing some high level statistics on vulnerabilities:
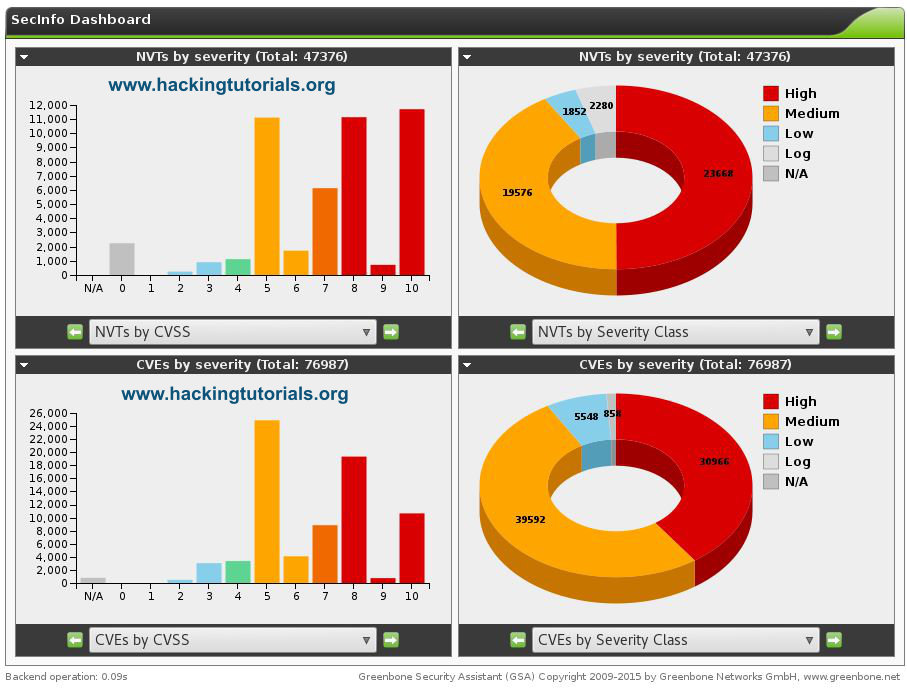
With the vulnerability dashboard we will conclude this tutorial. We recommend you to get familiar with OpenVAS, the reports and the vulnerability database by running more scans and compare the results with other vulnerability scanner. Hopefully this tutorial has proven useful to you and will get you started in automated vulnerability scanner. Happy Scanning!
Let’s start with installing OpenVAS and run the following commands in a terminal session to download and install OpenVAS:
apt-get install openvas
openvas-setup
When the installation process is finished you will be presented a long password on the last line of the console. This password is used to login to the OpenVAS web interface so you need to save it somewhere and change it after the first login.
When the OpenVAS setup process is finished the OpenVAS manager, scanner and services are listening on port 9390, 9391, 9392 and on port 80. You can use the following netstat command to check if these services are listening:
netstat –antp
Running OpenVASNetstat –antp command Explained
-a all
-n show ip instead of host names
-t show only tcp connections
-p show process id/name
If the OpenVAS services are not running than use the following command to start these services:
Than connect to the web interface using a browser and point it to:openvas-start
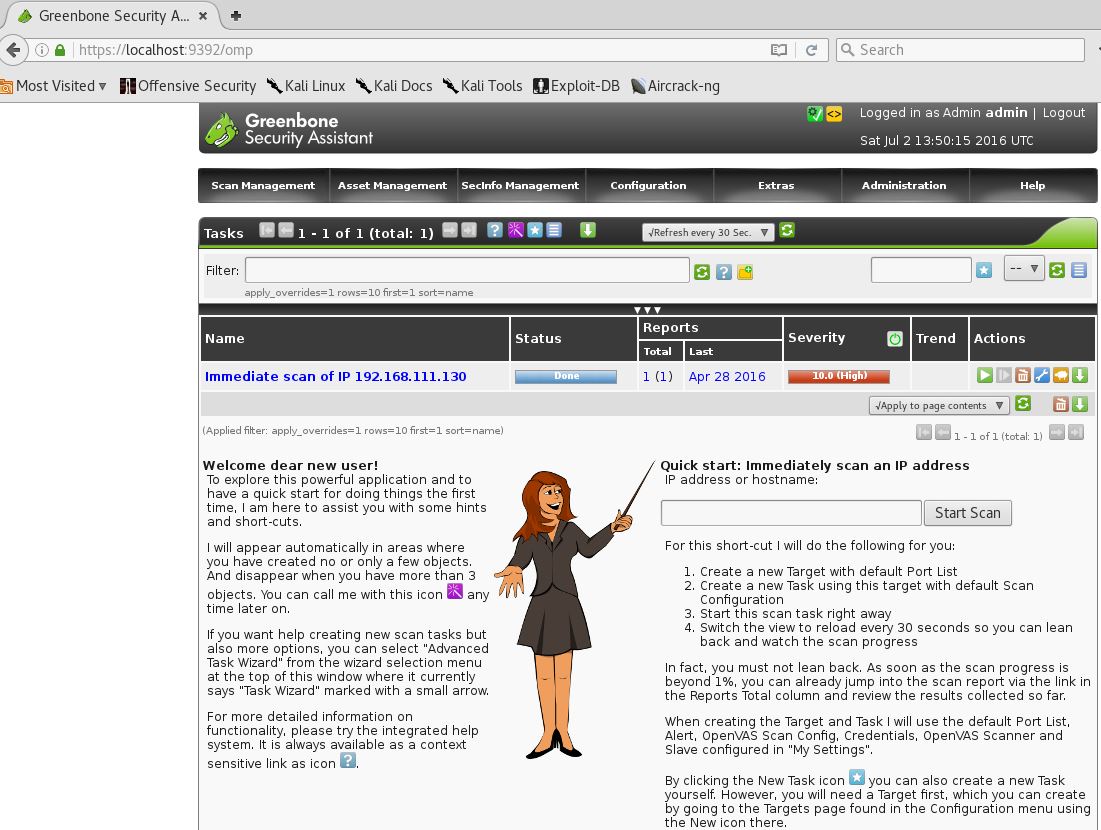
Accept the self-signed SSL certificate and sign in with user ‘admin’ and the password generated during the setup process. The web interface after logging in should look like this:
Scanning Metasploitable 2 with OpenVAS
Starting a scan with OpenVAS is very easy and straightforward. Just enter the target’s hostname or IP address in the quick start field and press the ‘Start Scan’ button. Make sure you only scan targets with OpenVAS you physically own or have (written) permission to scan. OpenVAS vulnerability scanner will generate a lot of network traffic which may lead to crashes or DOS.
When the scan is finished click to the reports page under the Scan Management menu and have a look at an overview of the scan results:
As you can see the Metasploitable 2 vulnerable machine contains 19 high, 32 medium and 6 low rated severity vulnerabilities. When you click on a report you can see a more detailed overview of the found vulnerabilities. The list of known vulnerabilities is ordered on severity:
OpenVas offers a lot more functionality, including the vulnerability database from the feed categorized in CVE’s, NVT’s and CPE’s. The SecInfo Management tool also offers a nice dashboard showing some high level statistics on vulnerabilities:
With the vulnerability dashboard we will conclude this tutorial. We recommend you to get familiar with OpenVAS, the reports and the vulnerability database by running more scans and compare the results with other vulnerability scanner. Hopefully this tutorial has proven useful to you and will get you started in automated vulnerability scanner. Happy Scanning!